Interior Design

DESIGNER SINKS

Designing is really about creating a quality of life, and a beauty in that life that nourishes the soul, that makes life beautiful.
— Albert Hadley

When Kent and I bought our home six years ago, we were looking for a house that did not need to be remodeled. Having previously owned an older cottage in the Wolflin neighborhood, we’d had our fill of renovations! But like most people, we soon forgot past renovation woes and dreamed of adding our style to the new home. As artists, we are always interested in creating something beautiful. We can’t resist reimagining our spaces, and that leads us to more remodeling!

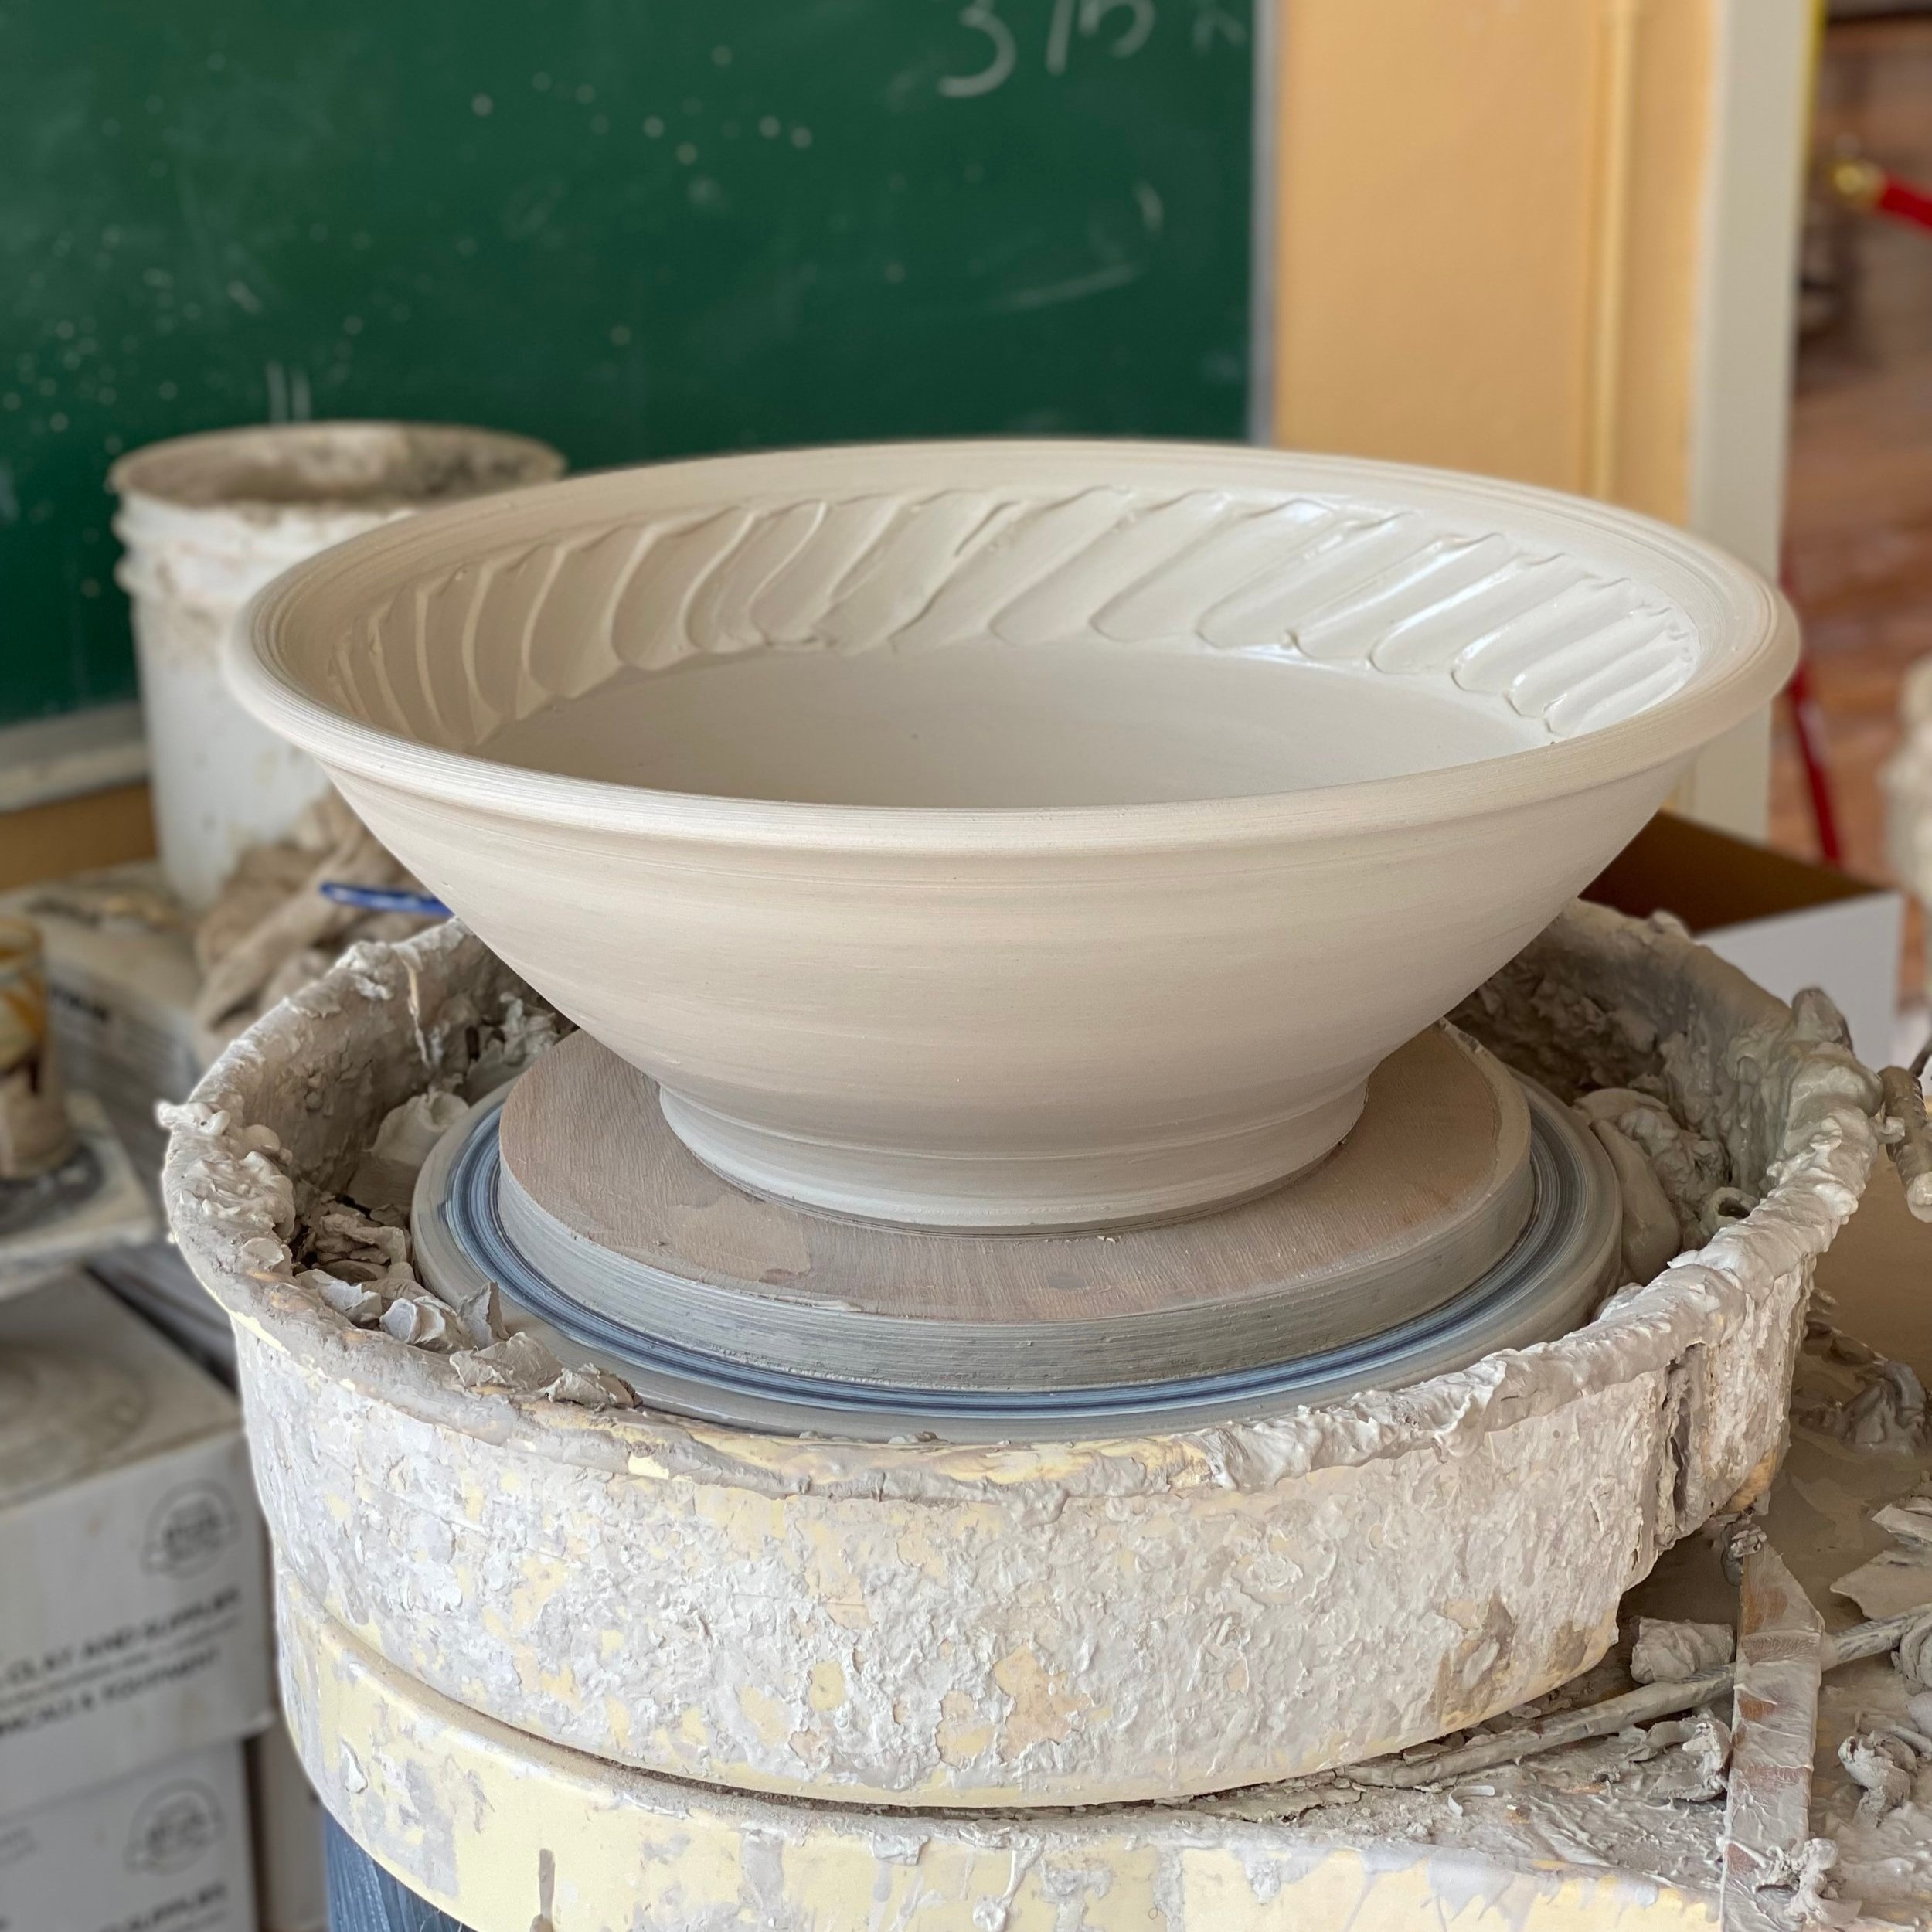
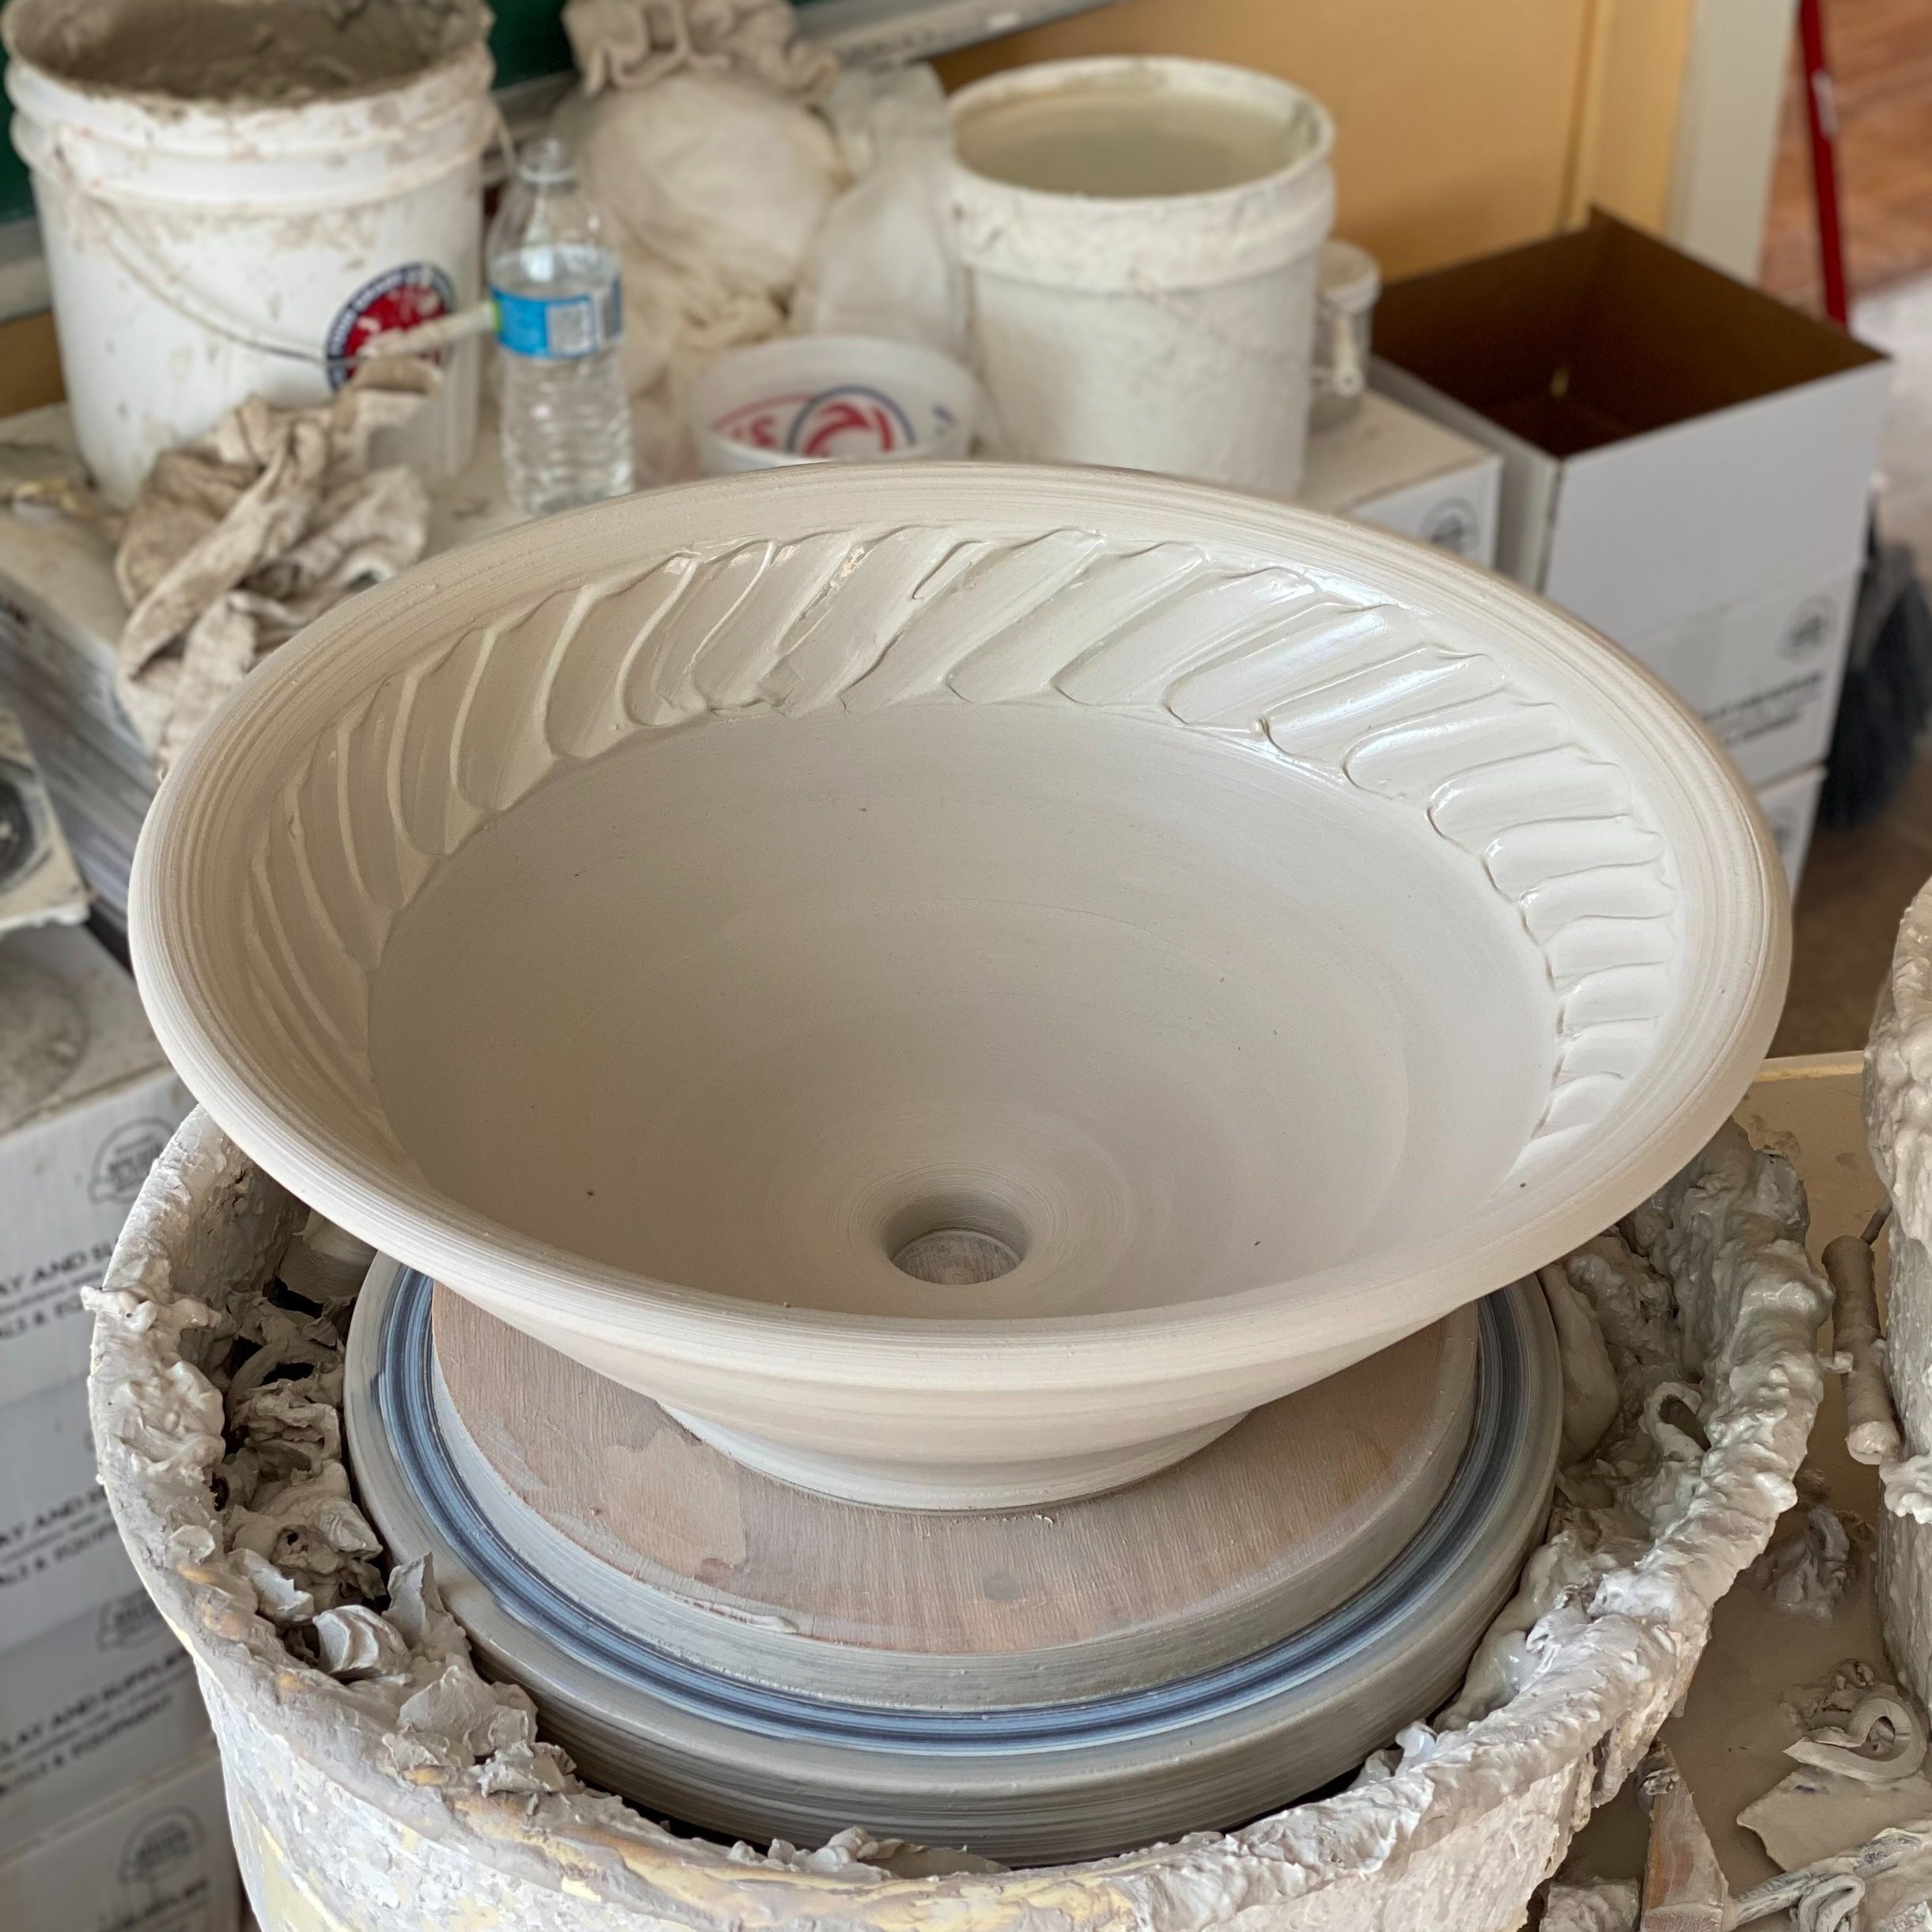
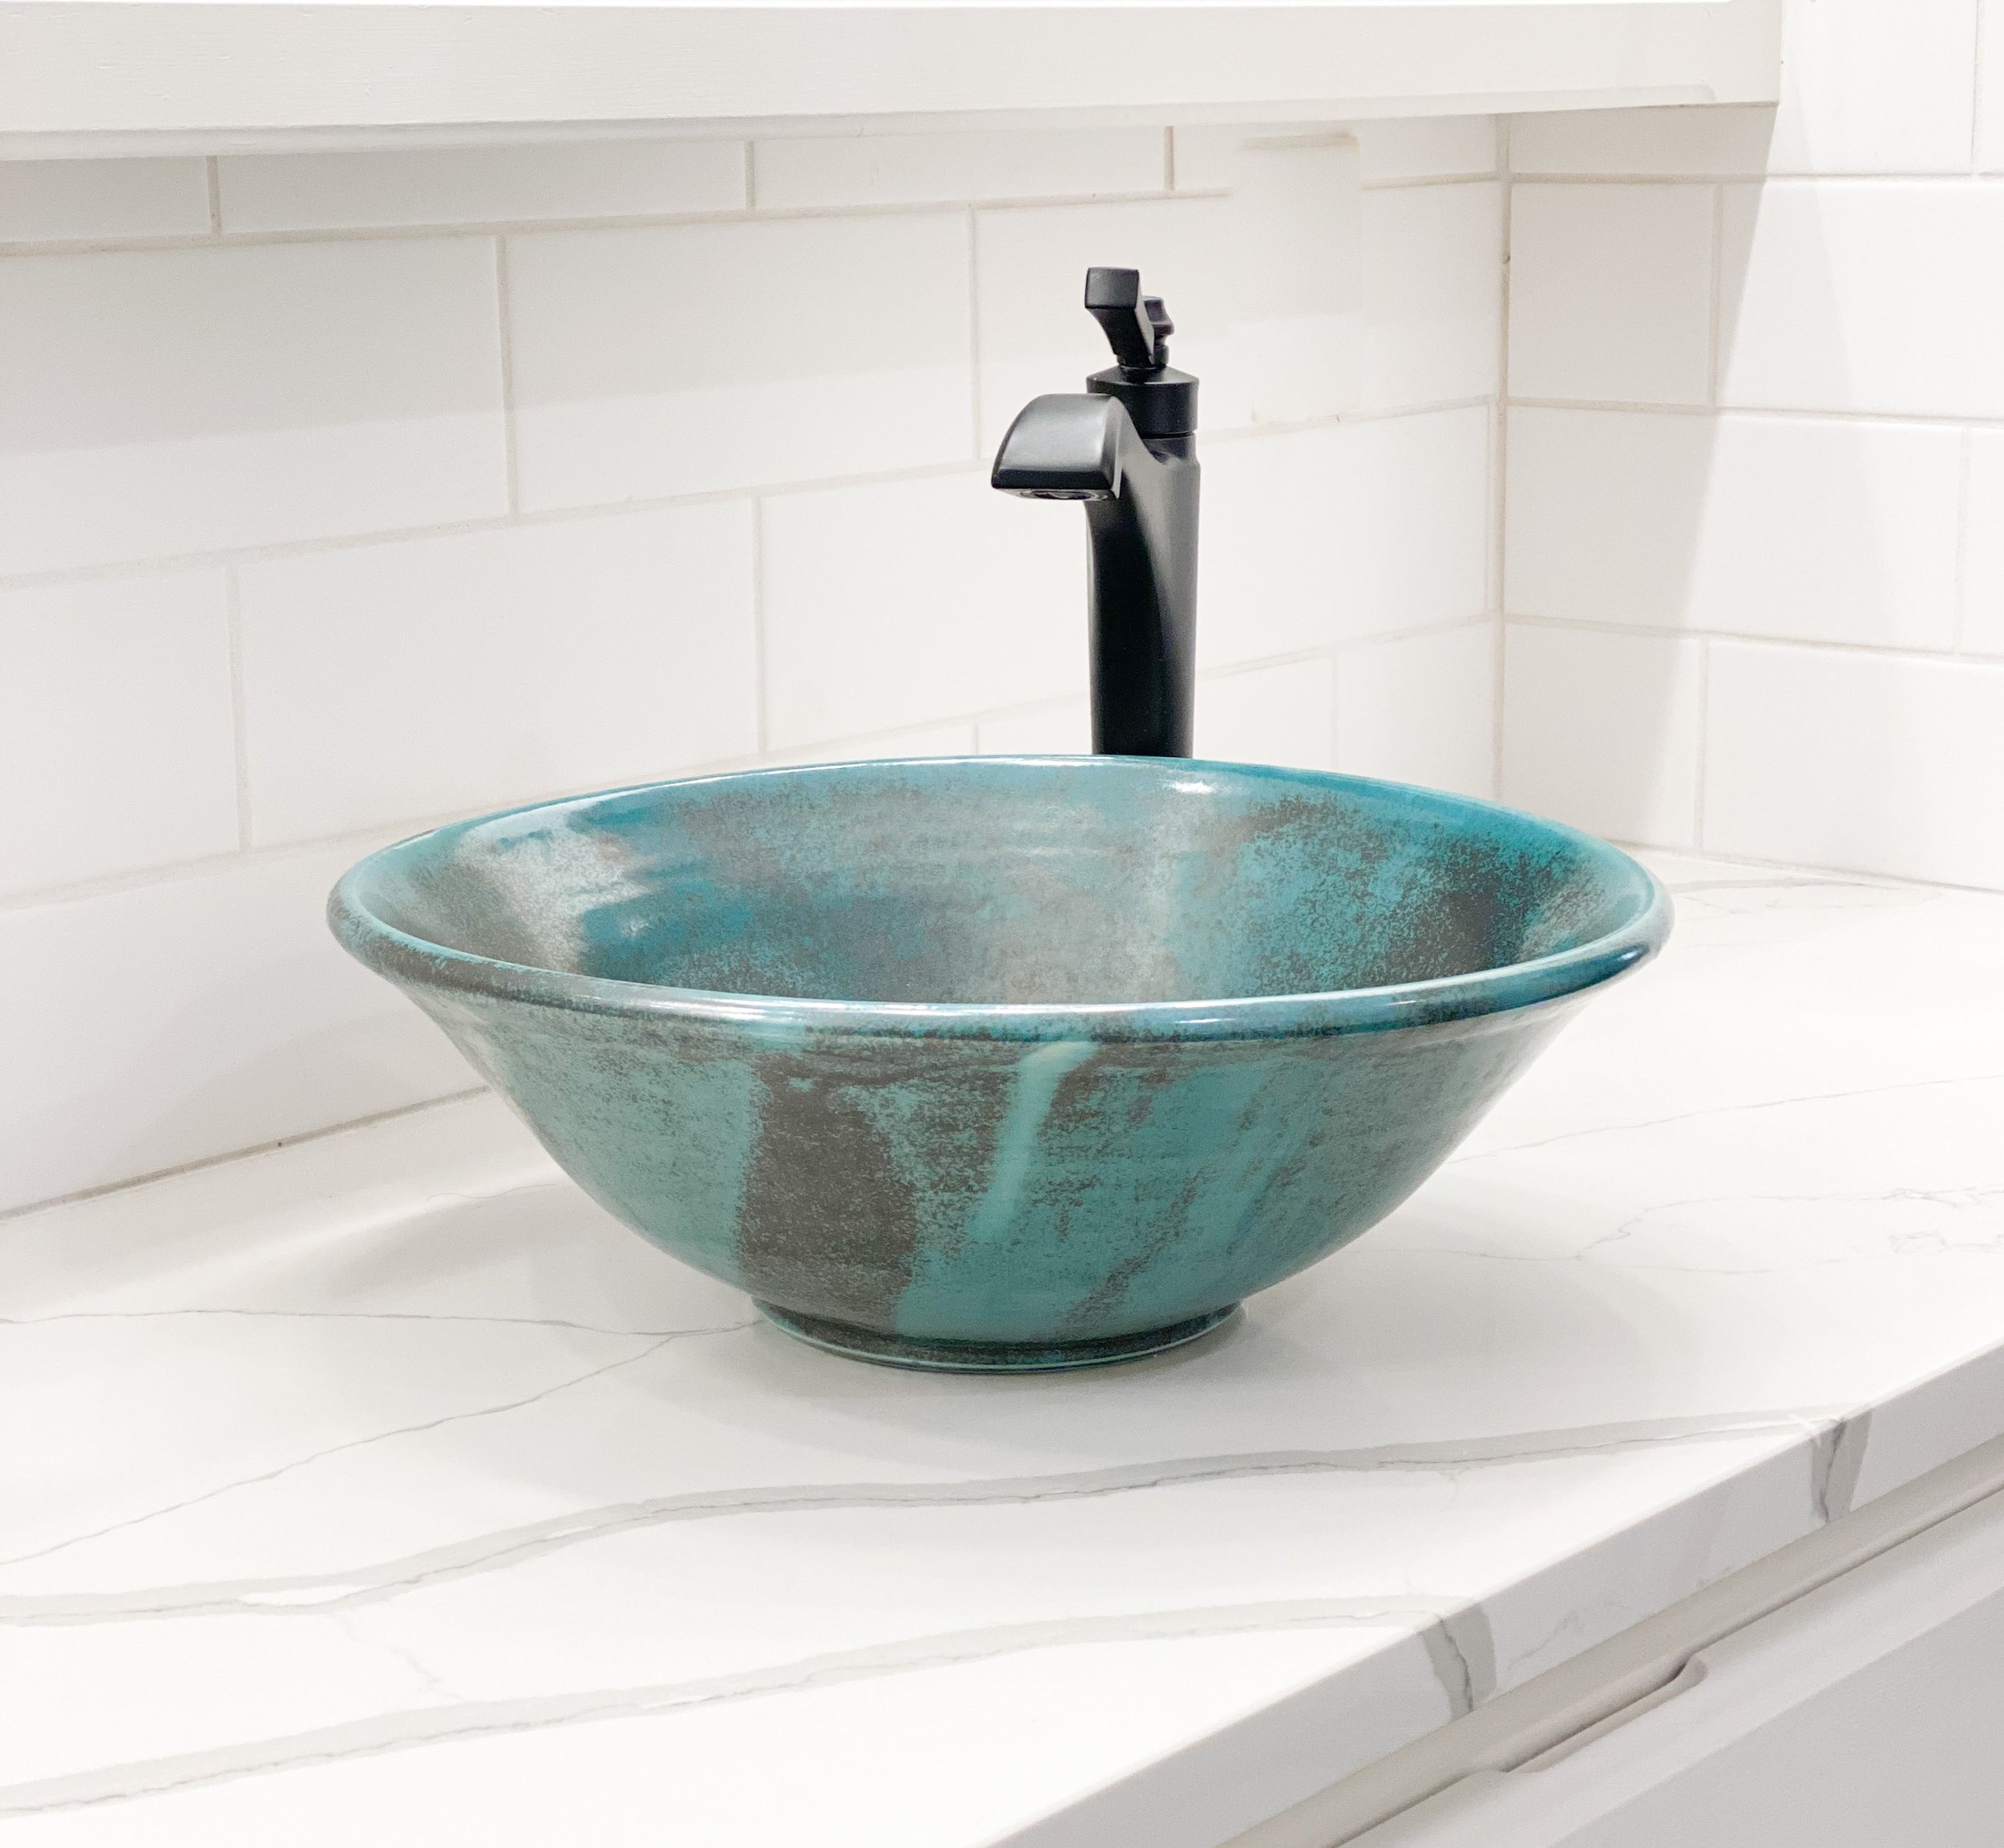
This past year we focused on updating the Master Bathroom and Guest Bathroom. New countertops create the perfect backdrop for sinks Kent made on the potter’s wheel. For the Master Bath, Kent formed two sinks that were identical in shape and similar in color. After bisque firing the two sinks, he used a handmade turquoise glaze that evokes calm and tranquility. The natural streaks of black complement the new matte black fixtures. The bathroom's color palette is neutral, so the sinks become the focal point.

Kent has made some beautiful sinks in the past, but these are my favorites! This remodel has prompted him to make more like these to sell in our gallery. Handcrafted sinks are perfect for homeowners looking for something unique for their bathrooms. I’ve noticed a lot of people are combining custom ceramic sinks with artistic spouts for a designer look. If you want a one-of-a-kind clay sink, please get in touch with us or stop by the gallery during regular business hours. Sinks can be made with either porcelain or stoneware clay, and we have a variety of glaze colors to choose from. We would love to help you.

Our custom sinks are formed from soft clay on the potter’s wheel.

Kent forms a hole for the drain so installation is simple.

Design with Beauty in Mind.


SIDE BY SIDE

Back in January, the wild winter storms led to impromptu painting sessions with my niece Maddy Watkins. With school canceled and Maddy stranded in Amarillo, we used the unexpected time to paint together. Although she is only 19, she has already developed her talent for art through classes and practice. She is an avid photographer and loves to paint. Being a nature-lover like myself, she is interested in landscape painting. In this blog, I wanted to share how we painted side-by-side during the storms!

Over the past 20 years, I have taught many children, teens, and adults how to paint, but I usually teach large group classes that demand structured approaches and planned projects.  This was different, so I decided to take Maddy to my studio and wing it! First, I asked Maddy to rummage through my box of original travel photos and find an interesting image.  She picked a mountain scene near Silverton, Co where we both love to visit!   

Next, Maddy and I loosely sketched out our compositions on paper.  We then discussed our sketches and decided to use bits and pieces from each of ours.  We prepared our canvas panels with red acrylic paint mixed with GAC, a translucent, gloss medium to begin the painting.  Once the red ground dried, we painted outlines with an orangey-red hue, mapping out the shapes and creating visual pathways.  It all became collaborative as we mixed colors, chatted, and shared ideas!  What started as a painting lesson for my niece evolved into a painting session with a kindred spirit.  

I initially thought we would paint Alla Prima (or all at once), but after eight hours of painting over two days, neither of us was finished!  Maddy had to return to Houston before our paintings were complete, so she took hers home for final touches.  It took me several more sessions to achieve the look I wanted, but I love the final piece so much that I am bringing this one home!  Check out my finished painting below!

After sketching out our compositions on paper, Maddy (on the left) and I (on the right)  began to sketch directly on to the canvas panels!

After sketching out our compositions on paper, Maddy (on the left) and I (on the right) began to sketch directly onto the canvas panels!

 
This photograph shows our first layers of paint.  We tackled the foreground first and worked our way up the canvas.

This photograph shows our first layers of paint. We tackled the foreground first and worked our way up the canvas.

 
After the second layer of paint, things got messy!  We both started painting intuitively, focusing on different areas.

After the second layer of paint, things got messy! We both started painting intuitively, focusing on different areas.

After several more solo painting sessions, I finished the painting featured above.

After several more solo painting sessions, I finished the painting featured above.

Liven up your walls with original paintings.


PAINTING COMMISSION

A painting is merely a daydream until you begin to make marks on the canvas.  Last summer, I dreamed up a painting for a couple that had commissioned a large artwork for their bedroom.  The clients are avid art collectors who love color and expressionism.  It was an exciting prospect to create custom artwork for these family friends who love bold colors as much as I do!

The clients for this commission asked for a painting similar to pastel drawings of mine they bought years ago.  The drawings are small Alla Prima artworks composed of vibrant colors and staccato marks on a dark ground. 

Those drawings are a foreshadowing of my current painting process, though I now use the Alla Prima approach mostly in studies for more lengthy paintings.  I am free in my use of color and line when painting a scene “all at once.”  The challenge lies in taking that spontaneous approach and sustaining the energy of the mark-making in a longer painting. 

I love receiving commissions because I am forced out of my comfort zone.  I become a tightrope walker, balancing the clients' vision and the painting I dream up.  Stepping out on the wire will allow a mere dream to become a physical reality.  It’s easy to stand on safe ground, painting in my mind’s eye, but I finally walk out on the wire to gather reference photos, sketch ideas, and paint color studies.  

After painting a small study, I began the larger canvases with a bold red under-painting and dark shapes for the trees in the foreground!

After painting a small study, I began the larger canvases with a bold red under-painting and dark shapes for the trees in the foreground!

This photograph show the first layers of paint.

This photograph shows the first layers of paint.

The Study

To begin this commission, I did several gestural pencil sketches from original photographs of rural New Mexico.  The primary photographic reference is a scene with tall, thin trees in the foreground, wild sagebrush in the middle ground, and mountain ridges in the background.  Beginning with a photograph helps me envision the final painting, but I never feel bound to the captured scene.   When I started getting serious about art, my mother reminded me that artists “move things around”. Mama knows best!  The more experience I gained in drawing and painting, the more comfortable I became with the “moving around” process.  Now, I mostly use photo references as a jumping-off point.  

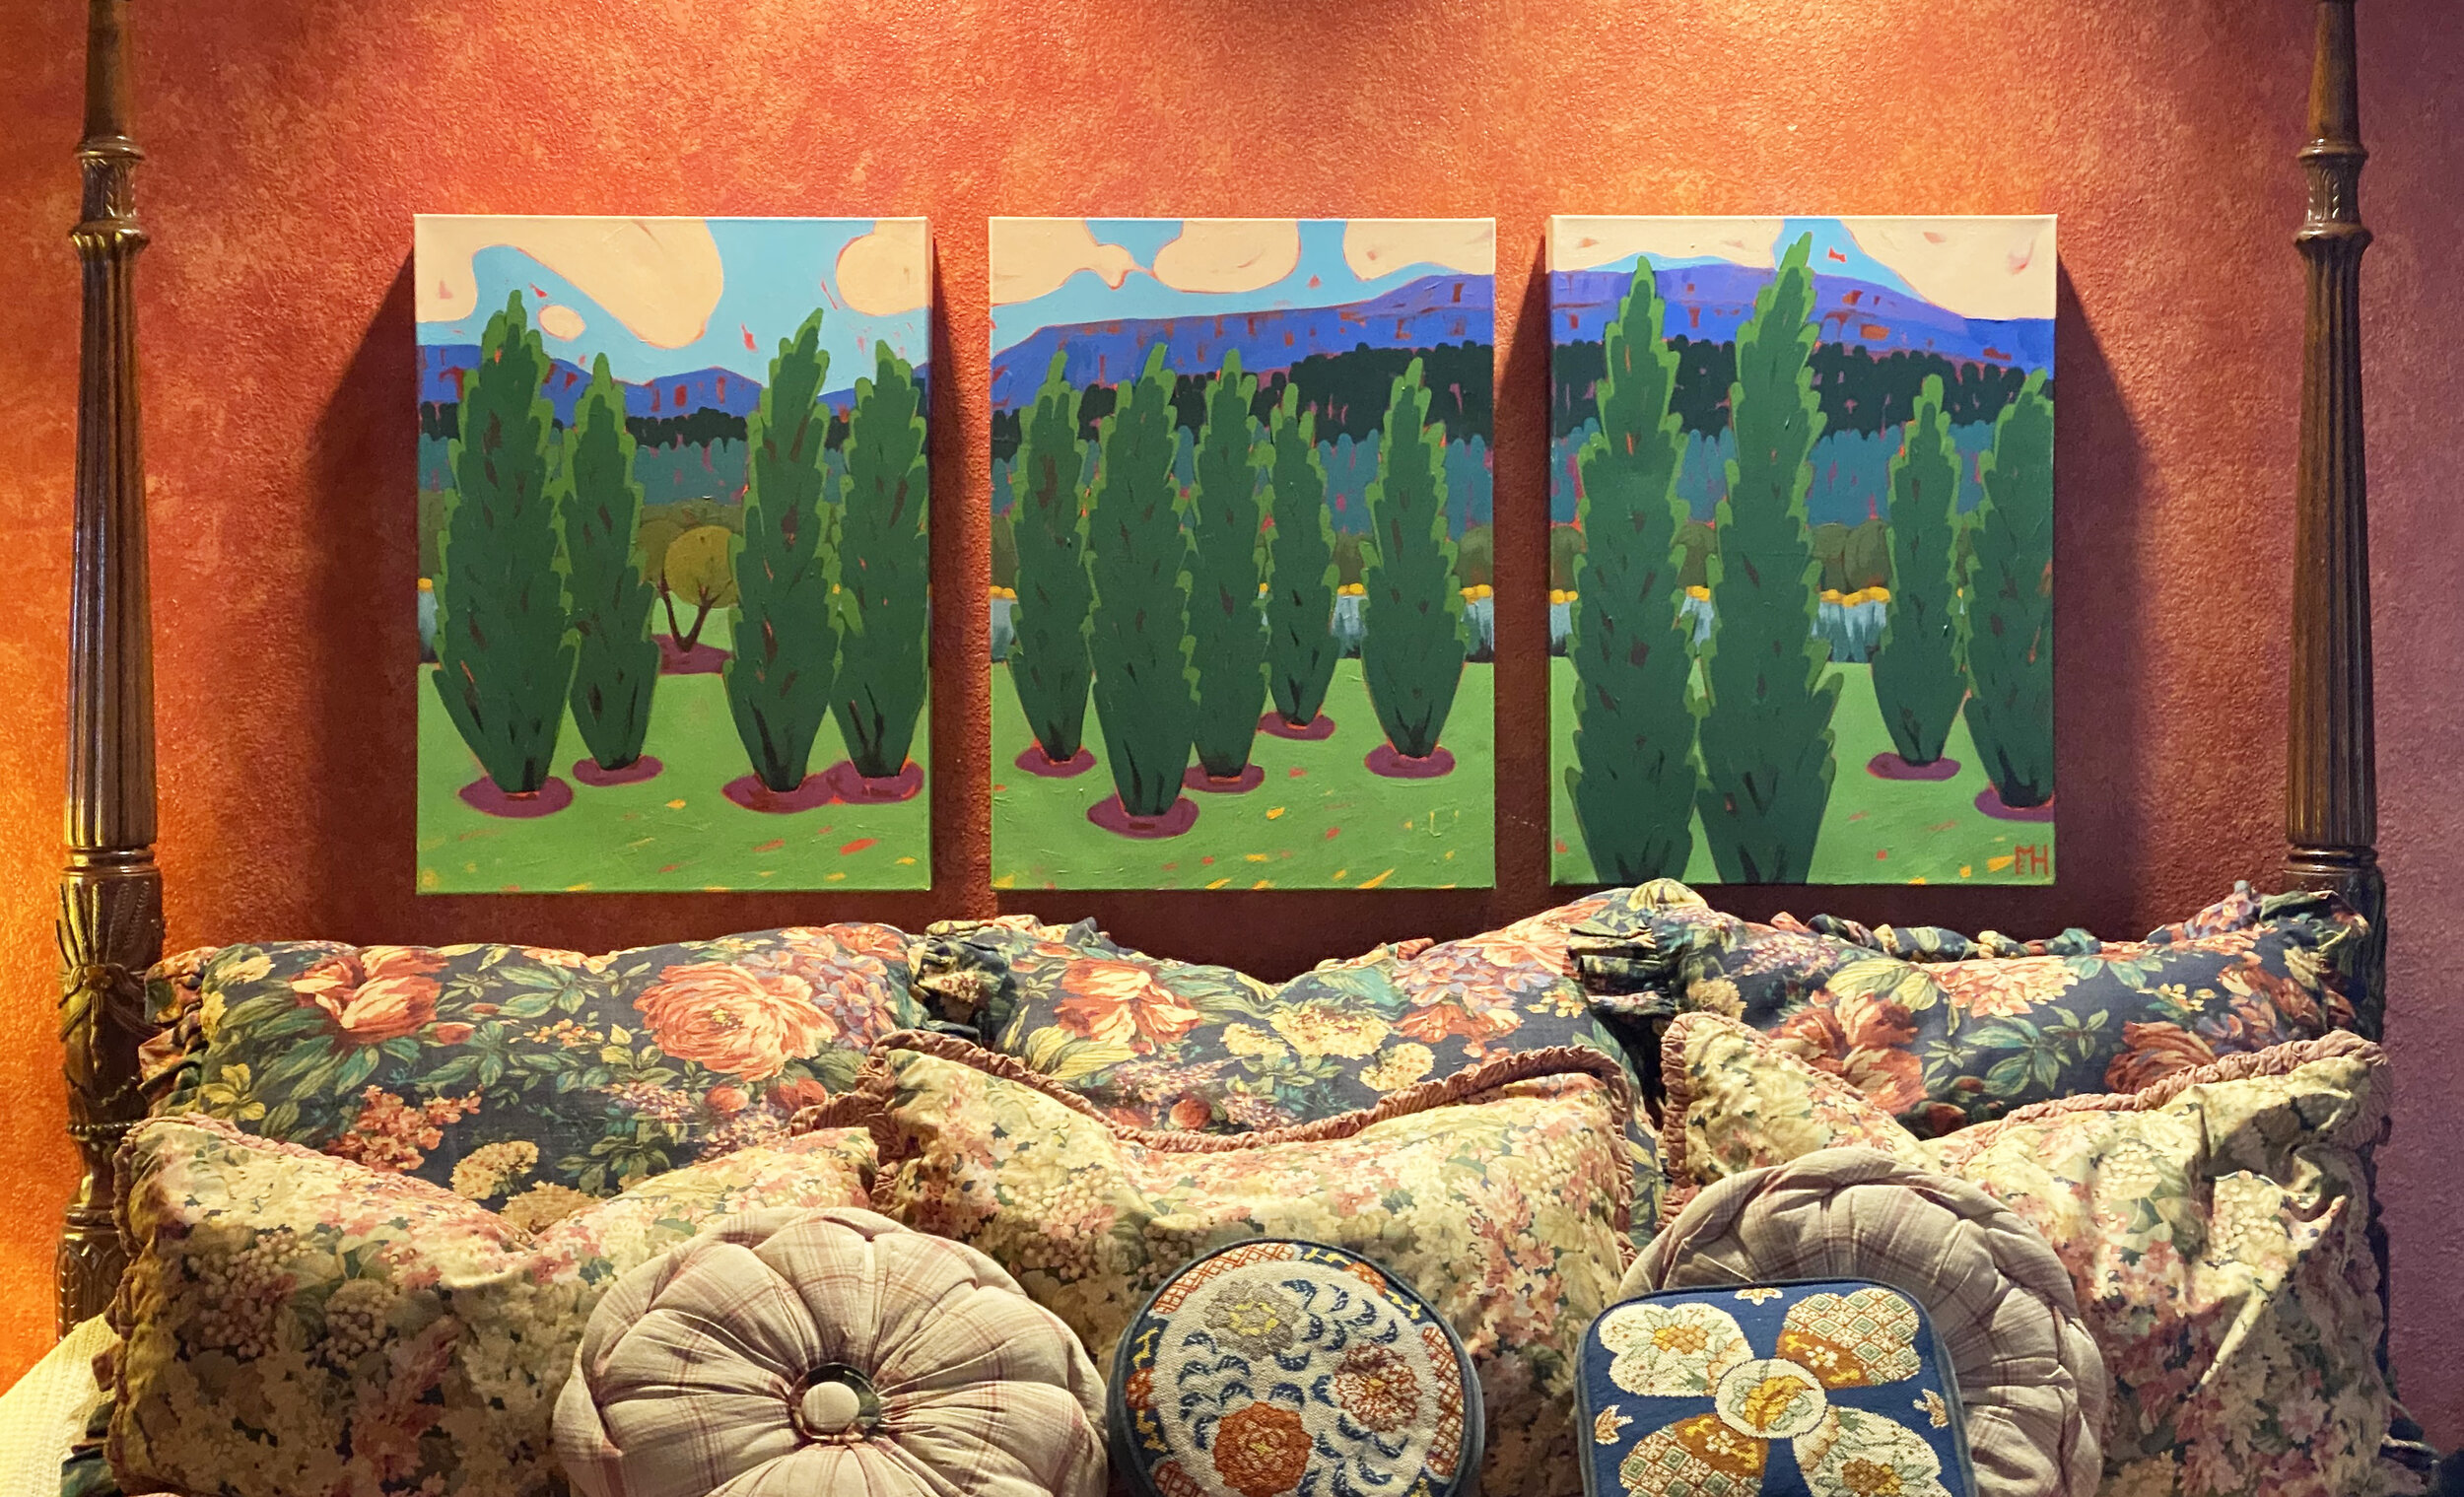
After sketching, I painted a textured watercolor paper with a thin wash of red paint.  A mixture of Cadmium Red and Quinacridone Magenta creates a vibrant background that is somewhat neutral in color temperature.  Starting with a red underpainting is also a little nod to the Fauves.  I let the base coat dry before drawing the scene with oil pastel.  (That is the Alla Prima part.)  Satisfied with the color scheme emerging with the oil pastel, I began to think about the space where the art would be installed.  I then stretched and primed three small 8” x 15” canvases on some old frames I had in the studio.  Next, I began a multi-layered three ‘panel’ study with acrylic paints.  I thought three canvases depicting one large scene would give the viewer the impression of looking out a window into a fantastical, colorful world.  It is also another little nod to works from the past, this time to European paintings from the Middle Ages when triptychs were so popular.  

Again, I painted a reddish layer to begin.  I knew this painting would need to be more ‘cool than warm’ to visually ‘pop’ off the richly glazed orangey wall where it would be hung.  Beginning with a red underpainting was excellent because it allowed me to paint complementary greens and blues for the following layers. I like to do a small study with the exact dimensions as the final piece because it allows me to work out the composition using shapes and spatial relationships, elements essential for landscape paintings.  In a large landscape painting, I try to create visual pathways that will lead the viewer’s eye into the painting and move it around the scene.  I also consider how to create an illusion of space using basic perspective techniques such as overlapping, scale, and value changes since I often defy the conventions of overt realism.  

Using three canvases to create one scene appealed to the clients, so I ordered new gallery-wrapped canvases that sit 2.5” off the wall.  The modular approach allows the canvases to be moved and hung more easily than one large, heavy canvas.  It also allows me to fully embrace the three-dimensionality of the deep canvases by painting the scene around the edges.  One of the benefits of this is that it looks best without a frame and further simplifies installation.  

From Study To Painting

Every mark you make in a painting informs the next, so naturally, every painting is different.  Even when I paint a study, the larger artwork will be unique.  One of the things I intentionally changed from the study is the light source.  When painting the study, I imagined the sun setting but later felt everything remained too dark.  For the final piece, I imagined the sun higher in the sky, backlighting the trees with a warm olive-green line and infusing the clouds with a pinky-orange glow.  Lightening the contour of the trees allowed them to stand firmly in the foreground and created a more convincing scene.  

The trees have at least five layers of paint.  I started with an undiluted Pthalo Blue to paint the shapes, as seen in the first photograph.  I then layered green paints to make the trees feel substantial.  While trying to increase the density of the trees, I lost much of the underpainting.  I decided to add strokes of Mars Black and Alizarin Crimson over the green and then add another layer of green to unify it all.  I love how the trees turned out, and I plan to rework a few trees in older paintings with a similar approach.

In this painting, I wanted the warm oranges and pinks in the foreground to suggest the earth under the grass and, simultaneously, be similar to the room's color.  I try to use the same hue in at least three different areas of a painting.  I have found it not only moves the viewer’s eye around the work but also aids in creating unity and balance.  I often don’t repeat the same exact color throughout a piece, but I will use the first color and mix it into another. In this painting, I carry the orange of the earth into the clouds and sagebrush.

After about thirty hours of painting the three final canvases, the artwork felt finished.  It’s important for me to make sure that the spaces read correctly, but at the same time, I want to leave expressive marks and reveal contrasting colors.  Trying to make it too “perfect” can lead to a very boring artwork, and I believe that should be avoided!  It’s time to show it to the clients when it is completely finished.   The clients for this painting loved it, and I am so happy!!  They immediately installed it at home and sent me the photo below. 

FinishedPainting.jpg

BRIGHTEN YOUR WALLS.


TILE PROJECT: PART III

Last summer, I promised to share photos of the completed tile project for our friends! If you didn’t get to read the first blog, TILE PROJECT FOR FRIENDS, I explained how Kent made over 300 tiles by hand for their newly built home. In the following blog, TILE PROJECT: PART II, I shared how the project was progressing. The tiles were installed in the fall, and Kent recently had a chance to stop by and snap some photos! We are so pleased to have Kent’s stoneware tiles enhancing our friend’s home. Now, we need to find some time to make tiles for our kitchen! More to come about that…

IMG_0959.jpg
 
IMG_0962.jpg
IMG_0965.jpg

LET YOUR HOME INSPIRE.


BIG POTS

Please take a 180-degree turn from last month’s blog post about teeny-tiny espresso mugs, and follow me as I muse about BIG POTS for this month’s post! Making large-scale pots is the secret desire of every aspiring potter. A ‘big pot’ demonstrates to family, friends, and fellow clay addicts that you know what you’re doing and that this obsessive passion you have is moving beyond a quirky hobby to something resembling art. Creating an intentional form as the potter’s wheel spins at 240 rpm is an achievement, no matter how much clay you use. To control 50 or 60 pounds of spiraling clay and pull the clay into a well-made pot several feet high is a considerable accomplishment!

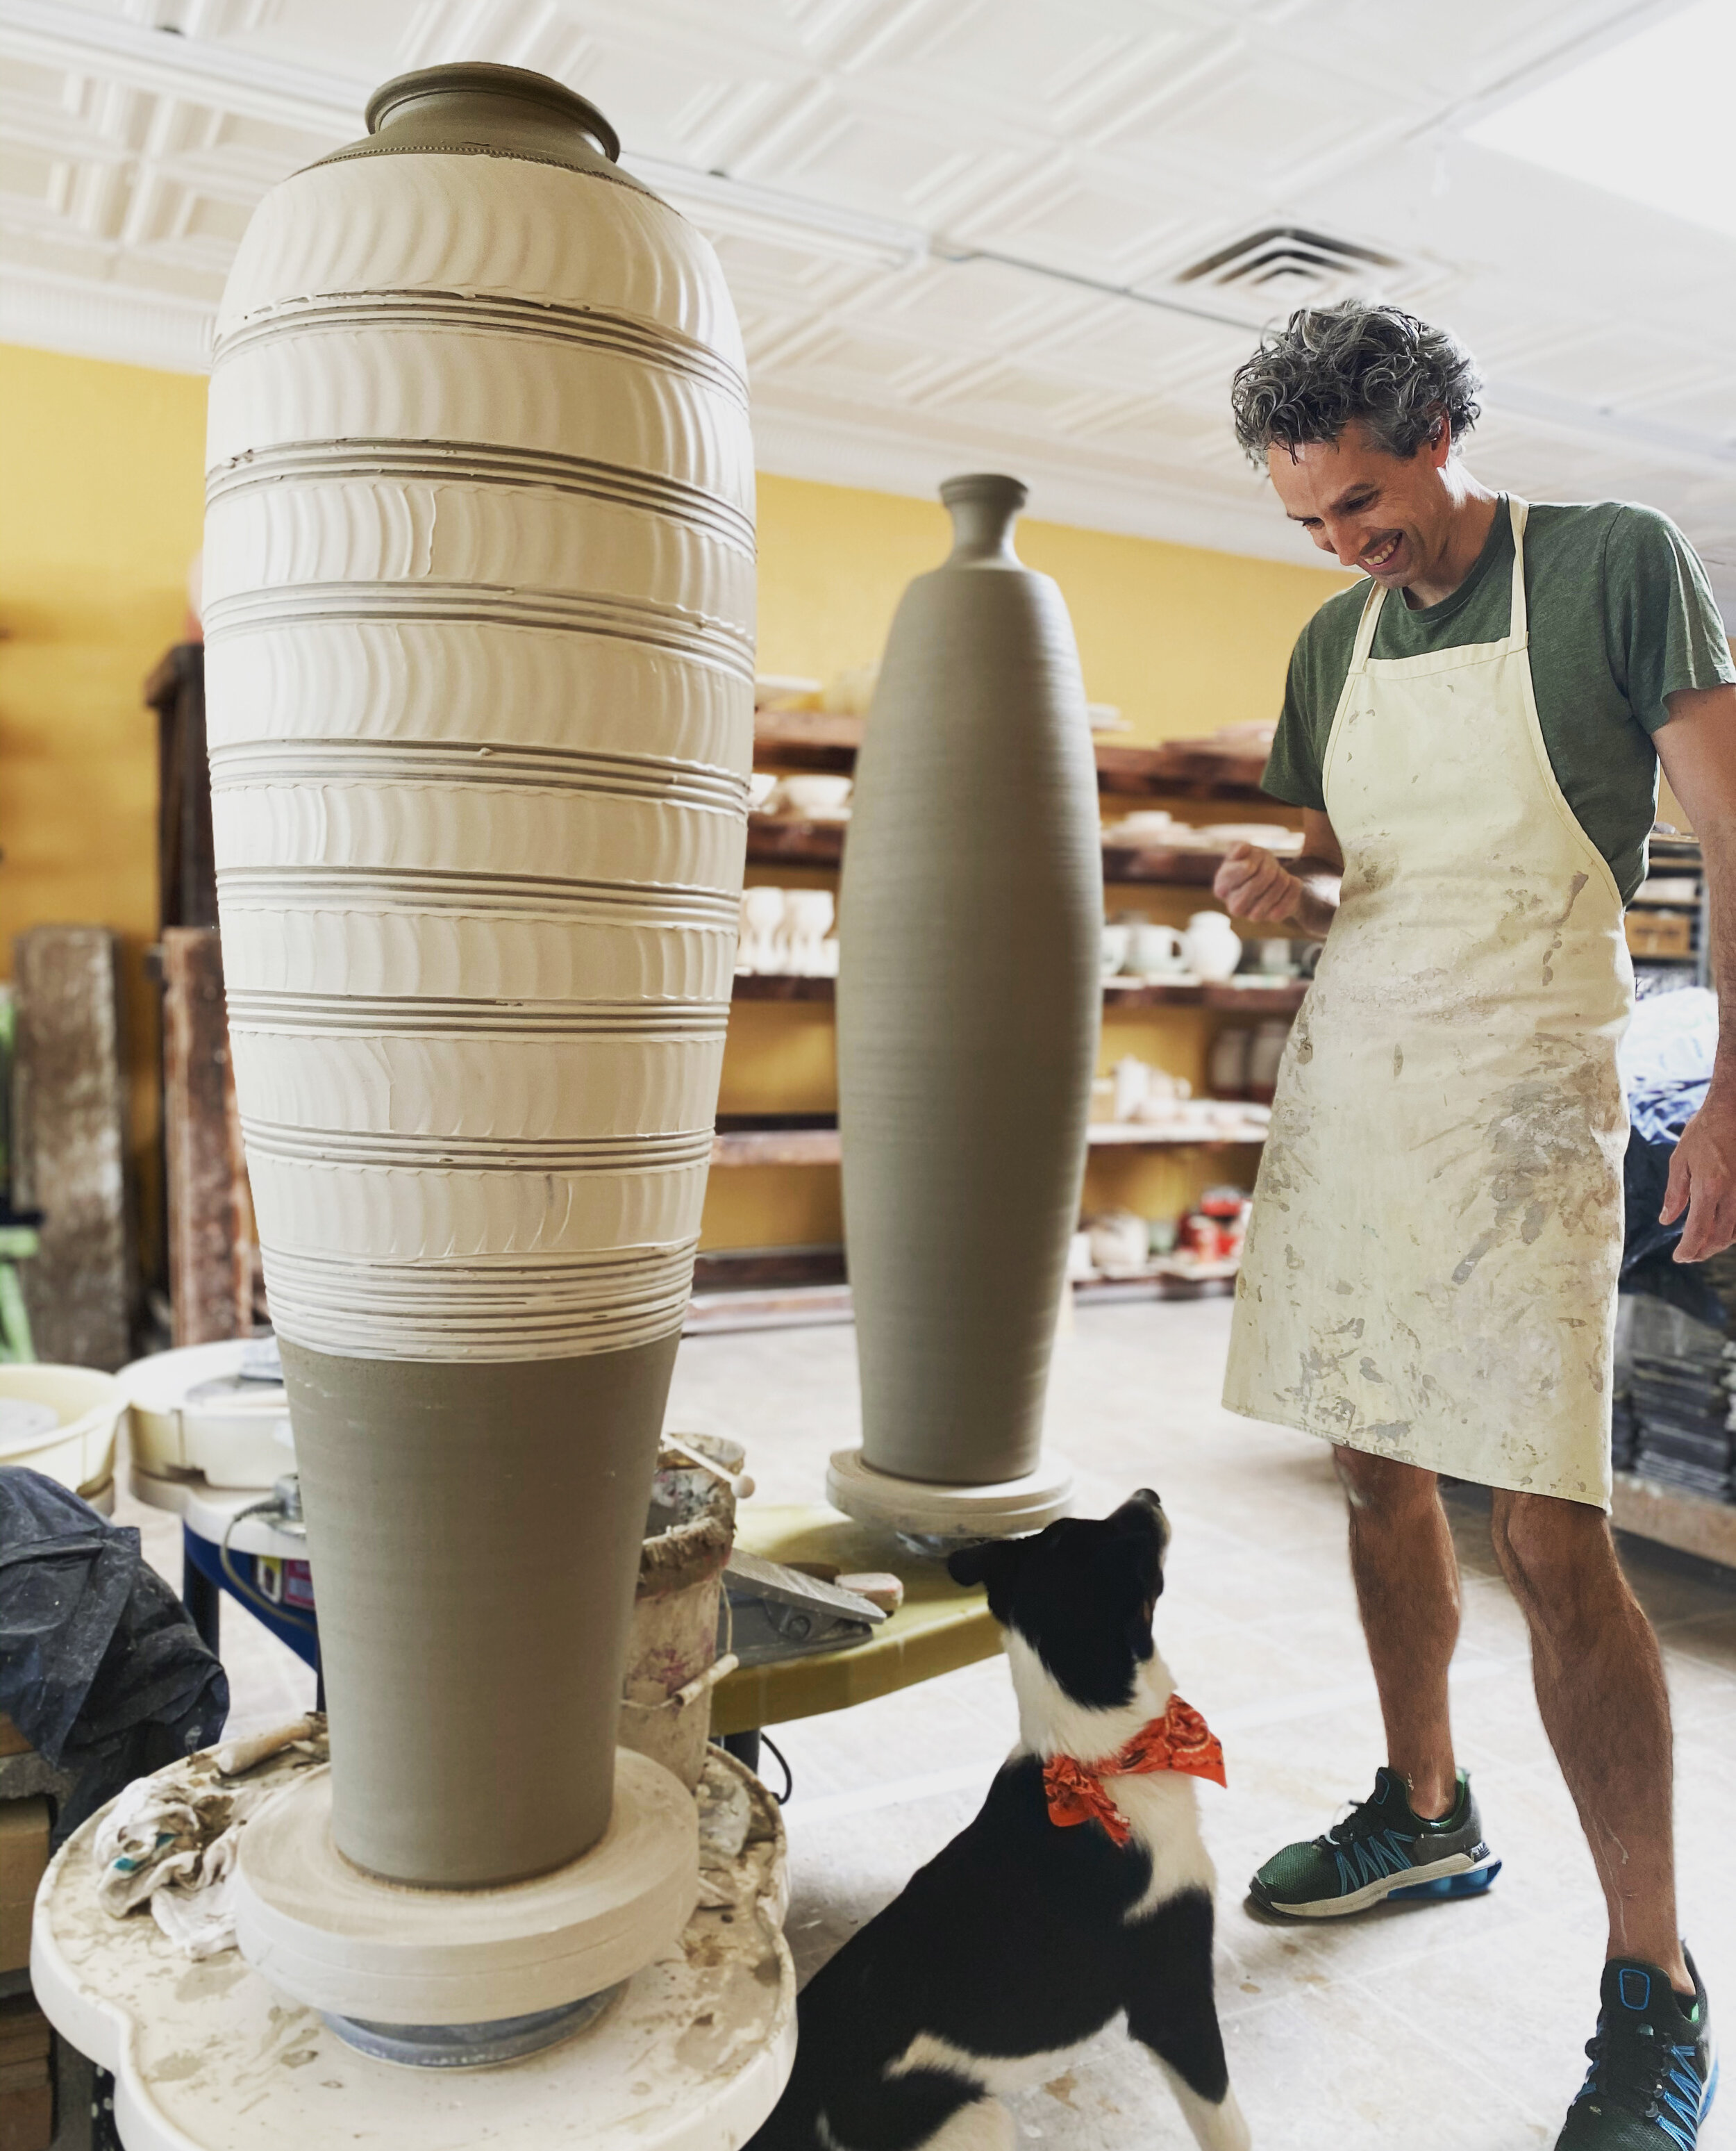
Kent and Ranger working on a commission for some large vessels.

Kent and Ranger working on a commission for some large vessels.

The first few times I tried to make a bigger vessel, I threw two cylinders, let them dry to leather-hard, and then joined them on the wheel. Unfortunately, it looked like I…threw two cylinders, let them dry to leather-hard, and then joined them on the wheel. That wasn’t really what I was going for! After that, I tried various versions of making thicker cylinders and attempted to ‘throw’ them together. They all dried crooked, and the clay was thicker where it was joined, but I was proud to have accomplished a ‘big pot.’ I gave several of those first attempts at tall cylinders to family members, and I secretly hope their dogs have knocked those old pots off their counters by now.

Kent’s pots have dried and are ready to be fired to 2400 degrees. Because these pots are too big for the electric kilns, we bisque fire them in the outdoor gas kiln.

Kent’s pots have dried and are ready to be fired to 2400 degrees. Because these pots are too big for the electric kilns, we bisque-fire them in the outdoor gas kiln.

I’m still working out the best way for me to make bigger pots, but Kent has cycled through a lot of techniques and found what works best for him. He has been working on mastering the art of the big pot for several years and is throwing many complex, large-scale forms! I wanted to write this blog not about my wobbly cylinders from years past but rather to show off Kent’s newest pieces that he made for clients of interior designer and boutique owner Kasey Tam.

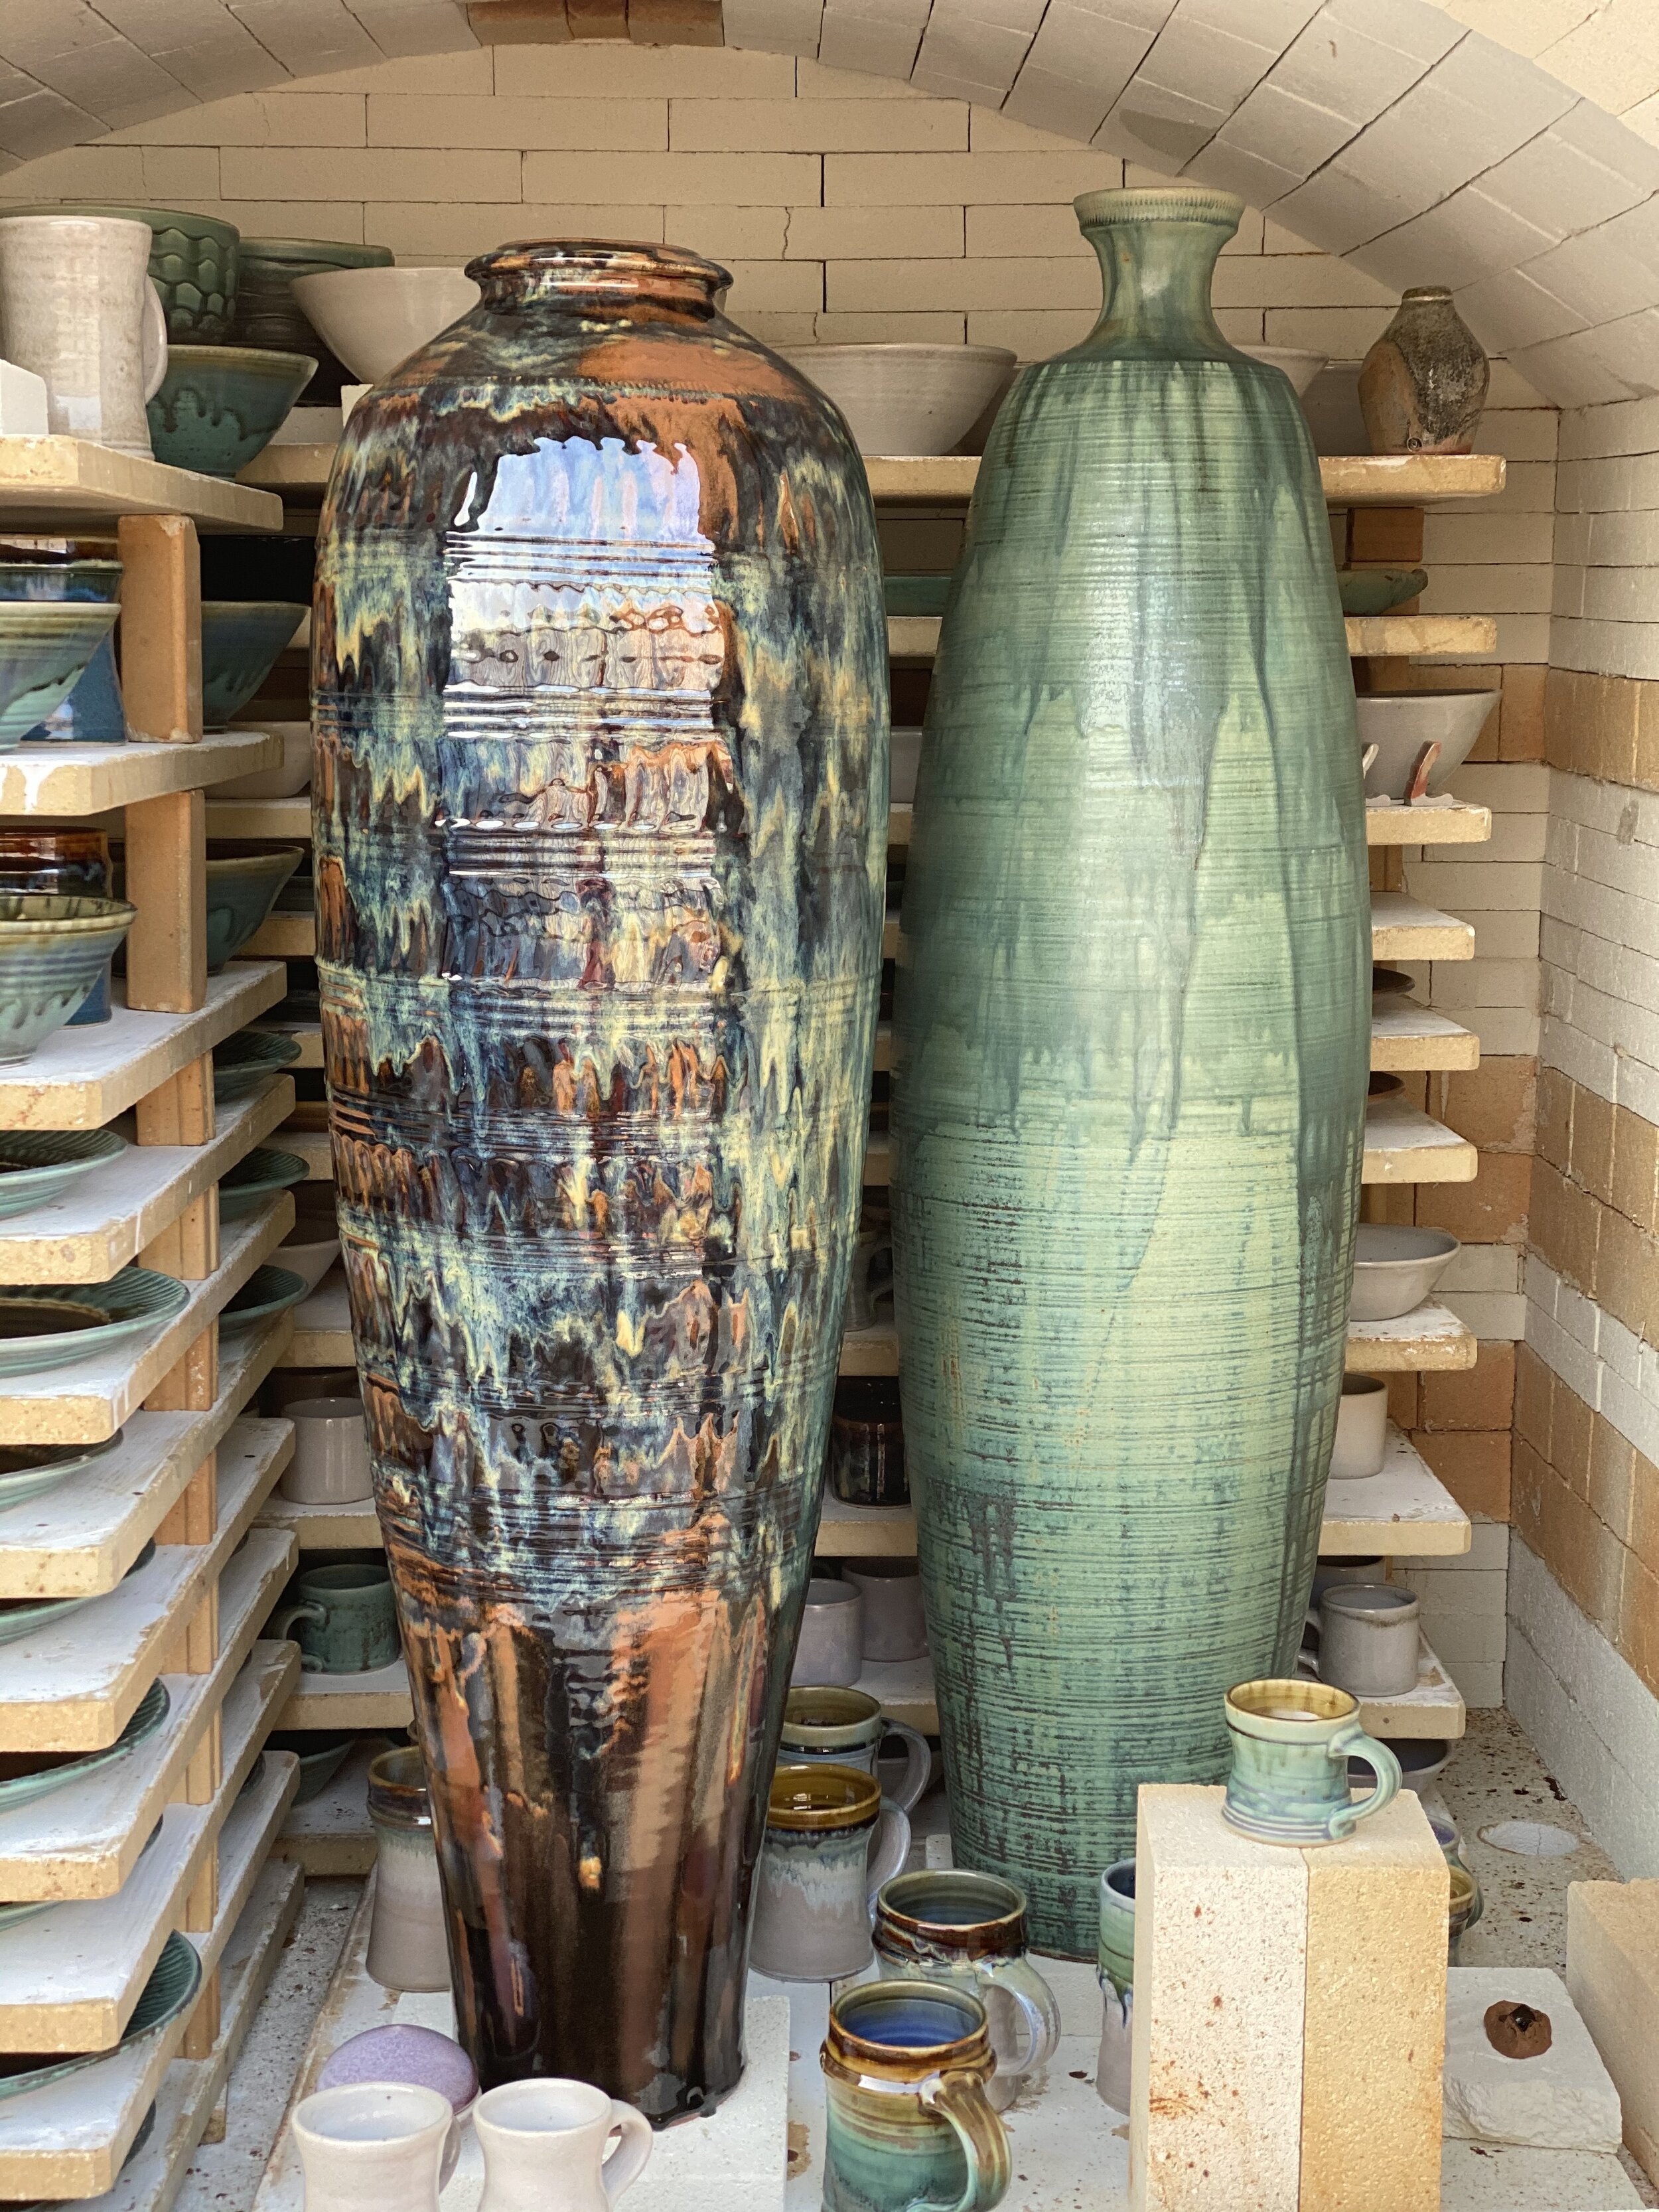
These two big pots of Kent’s turned out nicely in our recent glaze firing.

These two big pots of Kent’s turned out nicely in our recent glaze firing.

Kent started making big pots, much like me, but then experimented with the traditional Korean method used by Onggi potters. In the Onggi method, one drapes a large coil, or rope of clay, over one’s shoulder and presses and paddles the clay into a wall as the wheel slowly revolves. Kent made some stunning pieces with that technique, but in the past few years, he has returned to throwing individual sections and combining them on the potter’s wheel. What is so challenging about his method is that you have to envision all the sections before beginning and make large forms, to begin with. That means Kent has to center and throw up to 30 pounds for individual sections before joining them. Centering and throwing that much clay is difficult! The fact that Kent is 6’4” doesn’t hurt, but it’s not all biological. He has spent countless hours throwing pitchers and vases, building his skill set for the larger work.

Blue Sage Pottery’s Mascot, a.k.a. ‘Ranger the Wonder Dog’

Blue Sage Pottery’s Mascot, a.k.a. ‘Ranger the Wonder Dog’

Some of the pots in the photos included in this blog post will be displayed in a unique artistic home here in Amarillo, and we can’t wait to see the pots on display. Kent loved the challenge of working on this project because our clients are also friends! If you want to see more of Kent’s larger work, please stop by Blue Sage Pottery to view new pieces in our gallery. Also, check out Kent’s Instagram for some great process photos! Kent makes large-scale vessels by commission, so don't hesitate to contact us if you want to commission artwork for your home or office. We would love to speak with you!

Build your collection


TILE PROJECT: PART II

Recently, we fired 336 tiles in our outdoor gas-fueled brick kiln.  When we fire that many tiles, the kiln cools very slowly, and it is hard to wait for the results!  After taking the kiln to a temperature of 2380 degrees and letting it cool over three days, it was finally ready to unload. If you missed the blog, TILE PROJECT FOR FRIENDS, these tiles are for our friends building a contemporary home near us!  The tiles will be a back-splash in their kitchen and look awesome with their marble countertops.

You may notice that the tiles look to be different dimensions than the tiles in the first blog, and that is true!  Unfortunately, the first batch of tiles did have a little warping, because they needed a bit more grog in the clay.  (Nobody ever said ceramics was easy!)  Kent wasn’t happy with them because he wanted the tiles to be perfectly flat, so he mixed in more grog, changed the dimensions, and remade them. 

After the bisque firing, he did a light glaze application, so the tiles resembled a stone.  This glaze gets more variation and subtle artistic differences when applied thinly.  

Kent and I can’t wait to see how the tiles look when installed, and we will share the installation photos soon!

Flat tiles in the kiln!

Flat tiles in the kiln!

Stacks of tiles waiting to be packed up.

Stacks of tiles waiting to be packed up.

Adorn your home with handmade tiles.


TILE PROJECT FOR FRIENDS

Roll, cut, smooth.  Roll, cut, smooth.  Roll, cut, smooth.  You get the idea. There is a lot of repetition in the making of handmade tiles!  There are also a lot of steps. Roll, cut, and smooth are the first three. Then comes slow, careful drying, bisque firing, glazing, and glaze firing.  The main thing about handmade tiles is that they take time!  We have found that drying slowly is required to achieve flatter handmade tiles that are easy to install.  Yesterday, Kent and our friend Lance spent the entire day rolling out clay tiles and cutting around wood templates Lance made. 

Kent and I have done a few tile projects by commission. I have made custom tiles for a wine wall and, more recently, a carved tile for an antique piece of furniture. Kent’s tiles were used in a Parade of Homes House a few years back, and we also tiled our gallery bathroom this past year. It is fun to get off the potter’s wheel occasionally and challenge ourselves to try new things.

Kent and Lance spent an entire day rolling out clay tiles because Lance and his wife Chrissy are building a new home.  This is not just any home.  Their house has a contemporary spirit reflecting the couple’s design sense. Their home embraces industrial materials and natural finishes, and although it is not yet finished, it inspires house envy in most who drive by!  Lance offered to make the tiles with Kent since he has taken classes at Blue Sage Pottery and knows his way around our studio.  It means a lot for someone to want your art featured in their home, and Kent is excited about this project.  Check back for updates about how they glaze the tiles!


Cutting the tiles around the wood template.

Cutting the tiles around the wood template.

Working on the edges of the tile.

Working on the edges of the tile.

Ready to dry the tiles!

Ready to dry the tiles!

make your home as unique as you


EXCITING CHANGES

One of the things we love about pottery is that once a creation is fired, the job is done. Every physical detail making that pot or mug or bowl special is captured in time, and the future is up to its owner. Next time around we can experiment with a different glaze or design, but the job—at least for the moment—is finished.

IMG_4922.jpeg

Most of life is different. Life is in flux, the clay is still on the wheel. No matter how well things are going, we can work hard and make them better. That’s true for art, for businesses, for families, for everyone. We continue to grow and encourage growth in those around us. The more we improve ourselves, the more our community improves along with us.

Blue Sage Pottery is doing great. That might seem a strange time to make changes, but we didn’t get where we are by standing still. Just as we continue to hone our craft, we’ll keep doing everything we can to keep Blue Sage the premier pottery studio in Amarillo, Texas. We’ve updated our logo and we’ve given our website a makeover. But the soul of Blue Sage hasn’t changed.

WE STILL MAKE GREAT POTTERY

FFD2A283-8F28-4419-8BE5-E9B757F34D2E.jpeg

There was a time, not that long ago, that everything we used in our kitchens was made by hand. Every treasured pot and pan was one-of-a-kind. At Blue Sage, we’d like to get back to that mentality of building something that lasts, but keep the convenience we all love.

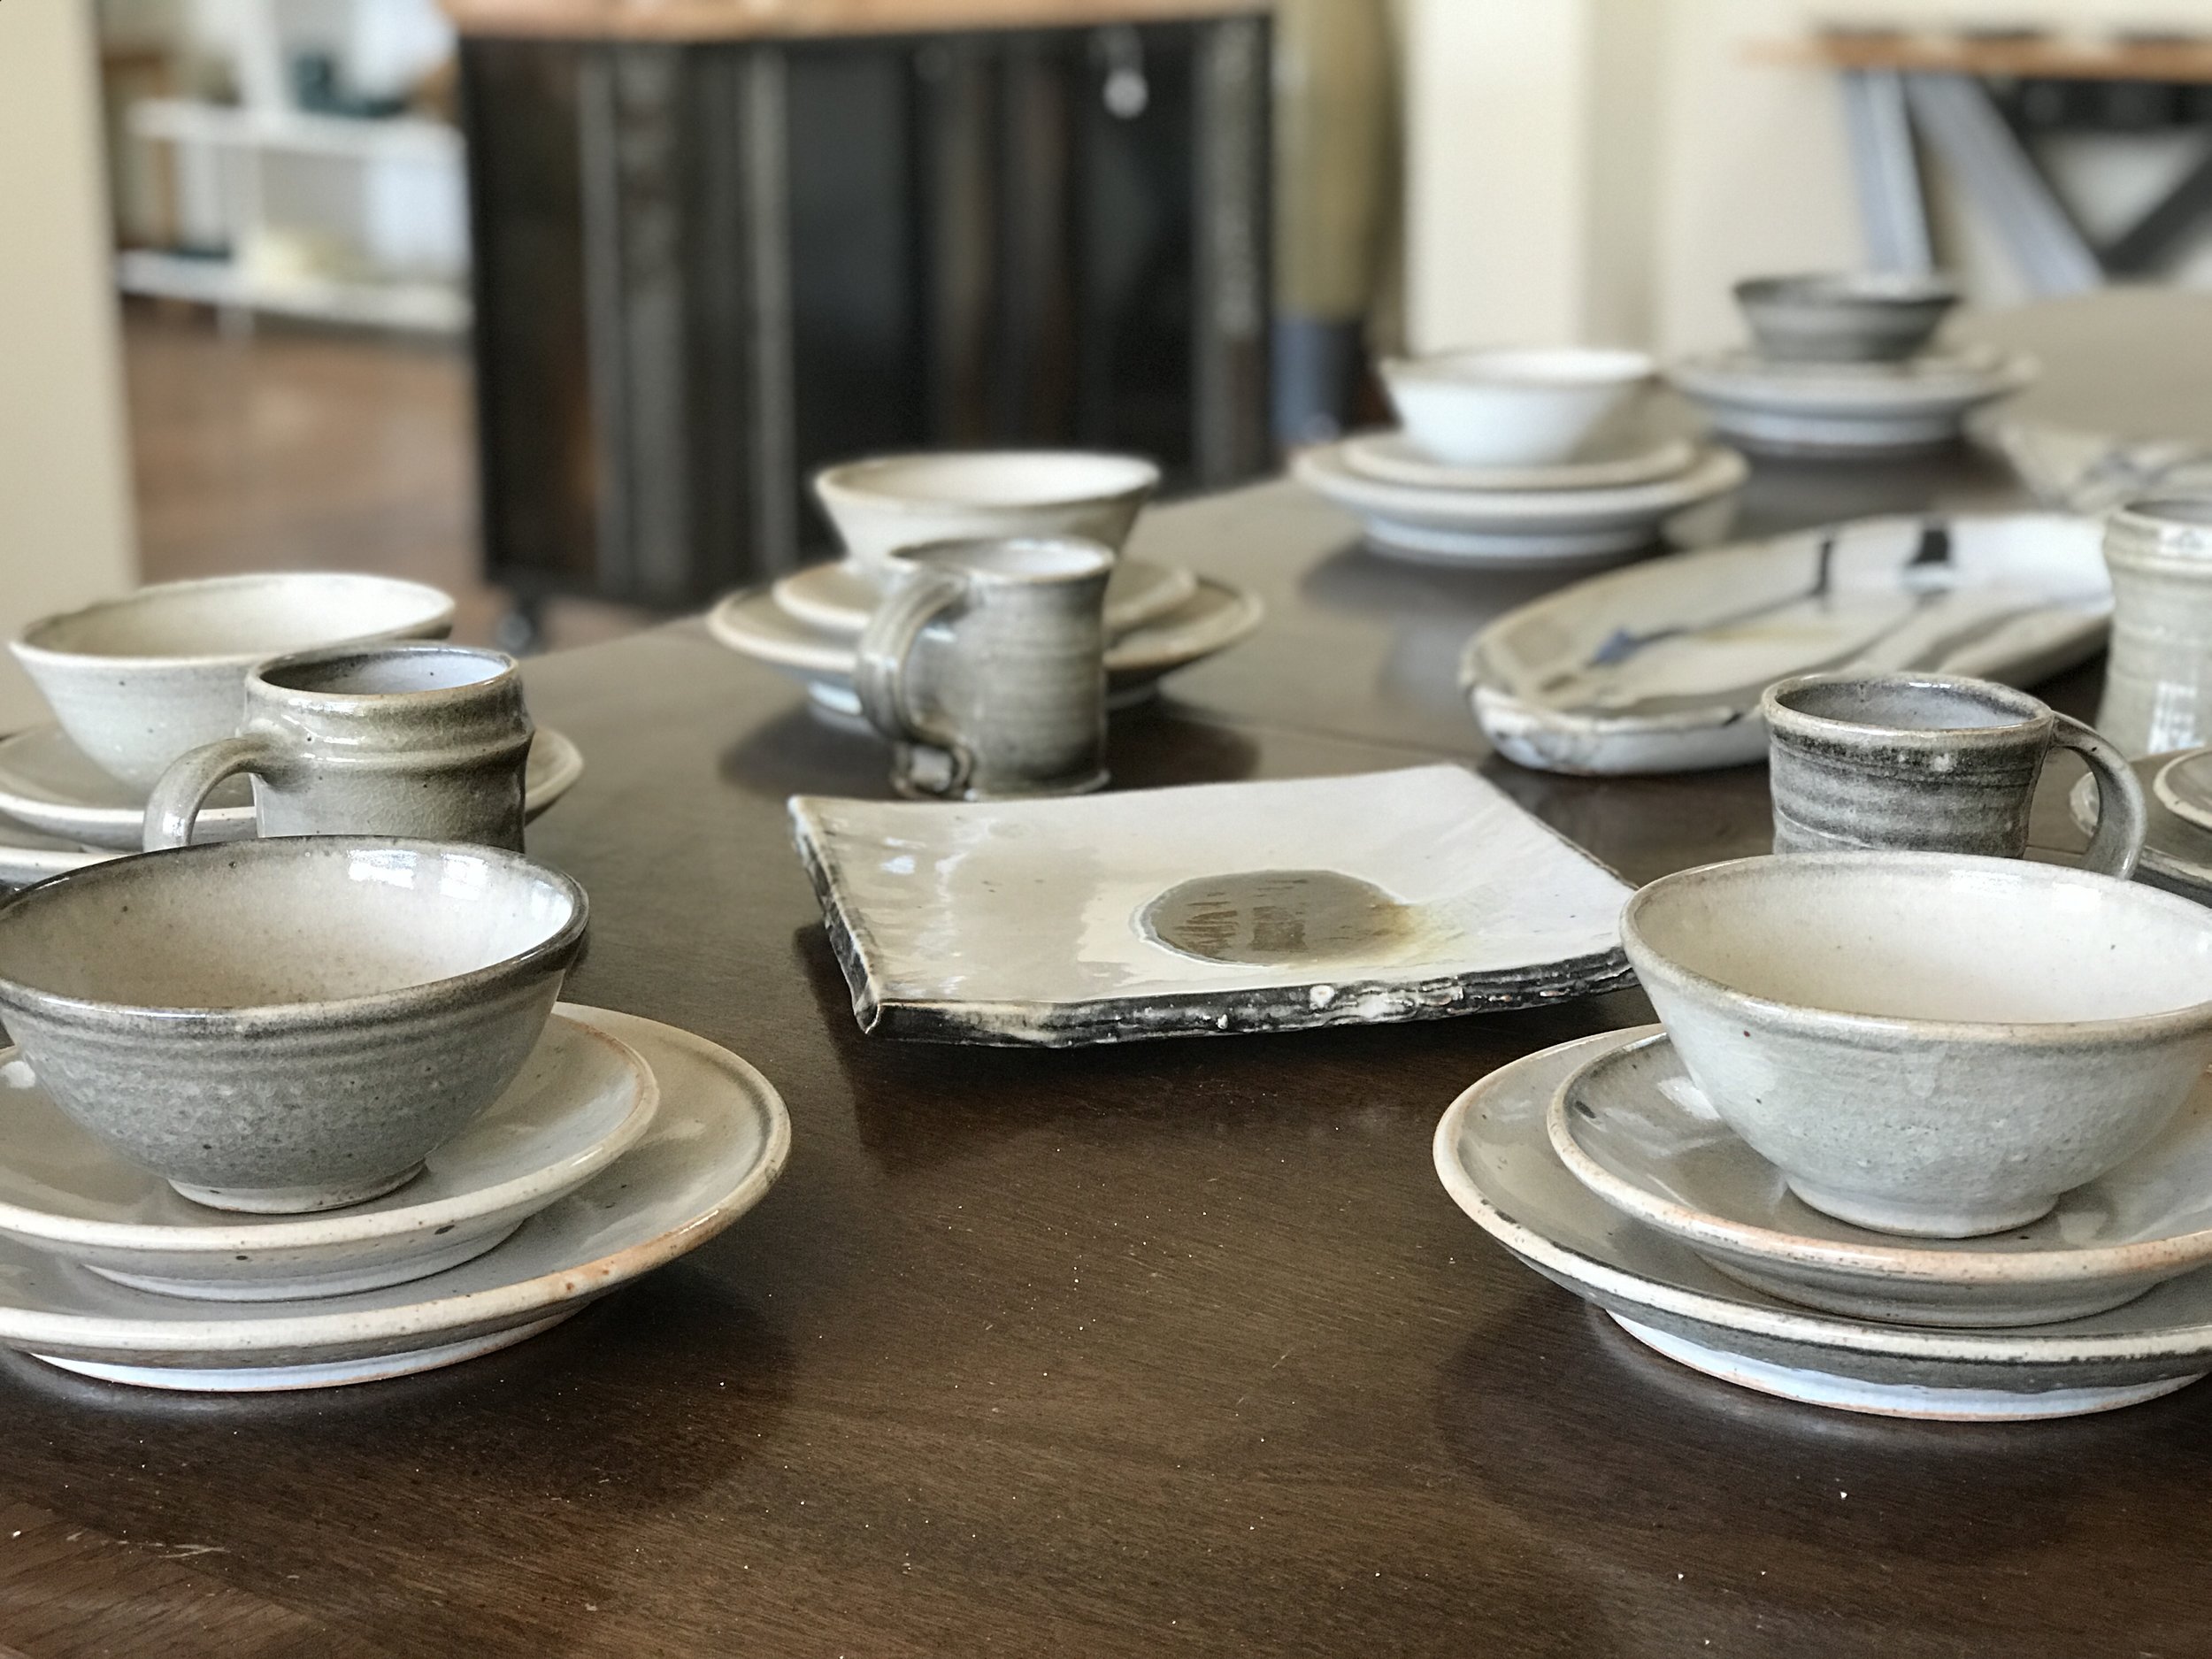
The quality of our pottery continues to be exceptional, with every piece unique, functional, and long-lasting.  We still make every piece by hand on the potter’s wheel or slab roller.  Our work looks great on display in your home or garden, but our pottery is useful in your daily life. Our clay and glazes are still dishwasher and kitchen safe.  Our pottery’s still as durable as it is beautiful, so you can brighten up meals and even your morning cup of coffee. All our pottery is dishwasher safe, so you’ll want to use it all the time!

We’ve expanded our partnerships with businesses who utilize our quality pottery for their own products. You can’t beat Blue Sage for consistency, and our large studio allows us to meet high demands. If you’re interested in using Blue Sage for your business, please contact us

Our selections of urns has grown. We believe everyone deserves to choose how they’ll honor someone, or how they’d like to be remembered. If you’re interested in our urns, you can visit our studio or browse our online gallery.

THE BEST POTTERY CLASSES IN AMARILLO

IMG_3677.jpeg

Artists have a long history of passing on their skills and secrets from masters to apprentices. That’s why we’re still offering the best pottery classes in Amarillo. Whether you’re wanting to learn a new skill, make someone an unforgettable gift, or just looking for a new way to relax, you can’t go wrong with our pottery classes. We were all beginners once, and artists of all skill levels are welcome. 

You can learn how to hand-build with clay or use the potter’s wheel. Each session lasts 7 weeks, with six weeks of classes. We take one week off for drying before glazing our creations. Those six weeks include two hours of instruction time and, for the wheel classes, two hours of open studio time per week. 

Our wheel classes meet Mondays, Wednesdays, or Thursdays from 6:30 to 8:30 p.m. and on Saturdays from 10 a.m. to noon. Tuition is $180 per session, which covers the use of clay, tools and equipment, and the glazing and firing of ten small to medium size pieces that you can take home.  

Our classes are in high demand, so space is limited. If you’re interested, you can learn more here. Remember, Blue Sage Pottery classes make a great gift!

OUR GALLERY

We’re fortunate at Blue Sage to run a gallery alongside our working pottery studio. At our location on 6th Street in Amarillo, on historic Route 66, you can see our pottery (and us!) in person.  We’d love the opportunity to meet you and demonstrate what makes our work so special. We’re open Tuesday through Saturday from 10 a.m. to 5 p.m. and on Mondays by appointment.

It’s an exciting time in Amarillo, Texas. The arts community is continuing to grow, and we’re doing our part to add our special flare to the thriving cultural scene. Not only is our gallery the place to showcase our pottery, it’s our opportunity to feature the work of local artists. Blue Sage is the perfect place to find something special for yourself or someone you love, and we always have something new.

We don’t know everything the future holds for Amarillo and for Blue Sage Pottery. But we’ll continue doing what we love and helping others do the same. Come visit us at our gallery, or browse our creations online. You’re sure to find something new and special.

IMG_4569.jpeg

Browse our online collection